Minimal Mistakes Maximal Efficacy
In a previous post we have seen how to create a website scaffold with Jekyll, change some settings, add a page, an image, and write a post. We used the default theme minima. While it can be good enough for a personal website, we may want to create a site for our business, still simple but with more options for the layout of our pages and posts, and a search index to filter our posts. In order to keep everything simple we will start from scratch creating a scaffold with Jekyll and modifying the content step by step. The theme Minimal Mistakes, created by Michael Rose, fulfills our requirements.
The PetsLovers website
We assume we have all the required software as described in the previous post. We will create a website for pets’ lovers starting from a Jekyll scaffold. Since we want our website to be hosted on a GitHub repository we follow its naming rule. We open a bash terminal (Git Bash for MS Windows) and run the command
$ jekyll new pets-lovers.github.io
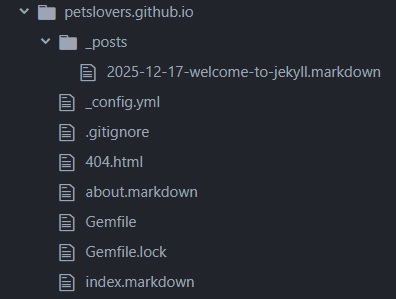
You should see a new directory pets-lovers.github.io with the standard Jekyll files: _config.yml, Gemfile, two pages index.markdown and about.markdown in the repository root folder, and a _post/ folder with one post.
What you have now is a Jekyll scaffold with the default minima theme. The first thing we have to change, before starting the Jekyll local web server, is the configuration file _config.yml. We’ll change the title as well as the theme. We will fetch the theme from RubyGems so we won’t need to write the list of Ruby plugins (aka gems) that are used by the theme Minimal Mistakes in the Gemfile. We can select one of the skins available for the theme by setting the minimal_mistakes_skin attribute. We also need to add the jekyll-include-cache plugin in the configuration file. We will use a Ruby package to enable a superset of Markdown called kramdown adding the markdown:kramdown attribute. We add the attribute search: true to enable the search index and we tell Jekyll to look for the _pages/ folder that we will create soon to host our website pages.
title: PetsLover
email: your-email@example.com
description: >- # this means to ignore newlines until "baseurl:"
  Write an awesome description for your new site here. You can edit this
  line in _config.yml. It will appear in your document head meta (for
  Google search results) and in your feed.xml site description.
baseurl: "" # the subpath of your site, e.g. /blog
url: "" # the base hostname & protocol for your site, e.g. http://example.com
twitter_username: jekyllrb
github_username:  jekyll

# Build settings
remote_theme: "mmistakes/minimal-mistakes@4.27.3"
minimal_mistakes_skin: contrast # "default" # "air", "aqua", "contrast", "dark", "dirt", "neon", "mint", "plum", "sunrise"
markdown: kramdown

plugins:
  - jekyll-feed
  - jekyll-include-cache

search: true

include:
  - _pages
We replace the content of our Gemfile to just these few lines
source "https://rubygems.org"

gem "github-pages", group: :jekyll_plugins
gem "jekyll-include-cache", group: :jekyll_plugins
In order to download all the required plugins we run the command
$ bundle
Before restarting the Jekyll server with the new configuration we have to
- create a new directory _pages/
- move the about.markdown and index.markdown files in _pages/ folder
- change the layout attribute in all post and page files to
layout: single - add the
permalink: /attribute in the index.markdown file that we moved to the _pages/ folder - create a new directory _data/ with the navigation.yml file for the menu in it
- create a new page year-archive.md in the _pages/ folder that will contain the list of posts
Assuming the first four steps are completed we create the configuration file navigation.yml for the website navigation with the following settings
main:
  - title: "Posts"
    url: /posts/
  - title: "About"
    url: /about/
The page year-archive.md that will contain the list of post in temporal order is the following
---
title: "Posts by Year"
permalink: /posts/
layout: posts
author_profile: false
---
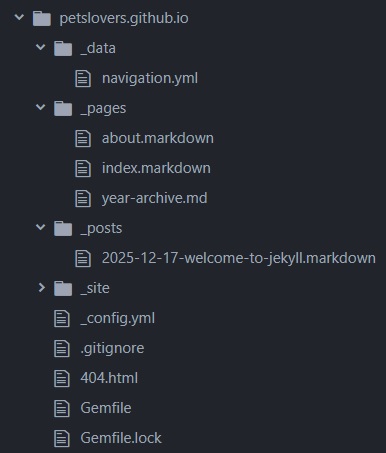
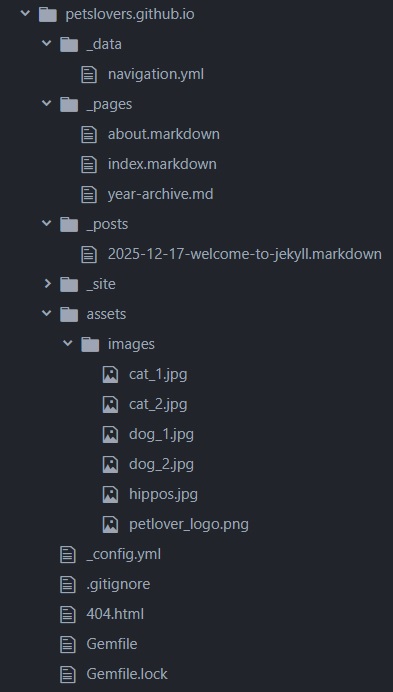
Now the structure of your repository should look like this
If we restart our Jekyll server
$ bundle exec jekyll serve
your landing page should look like this: a blank landing page with links to the Posts and About pages and to a search box.
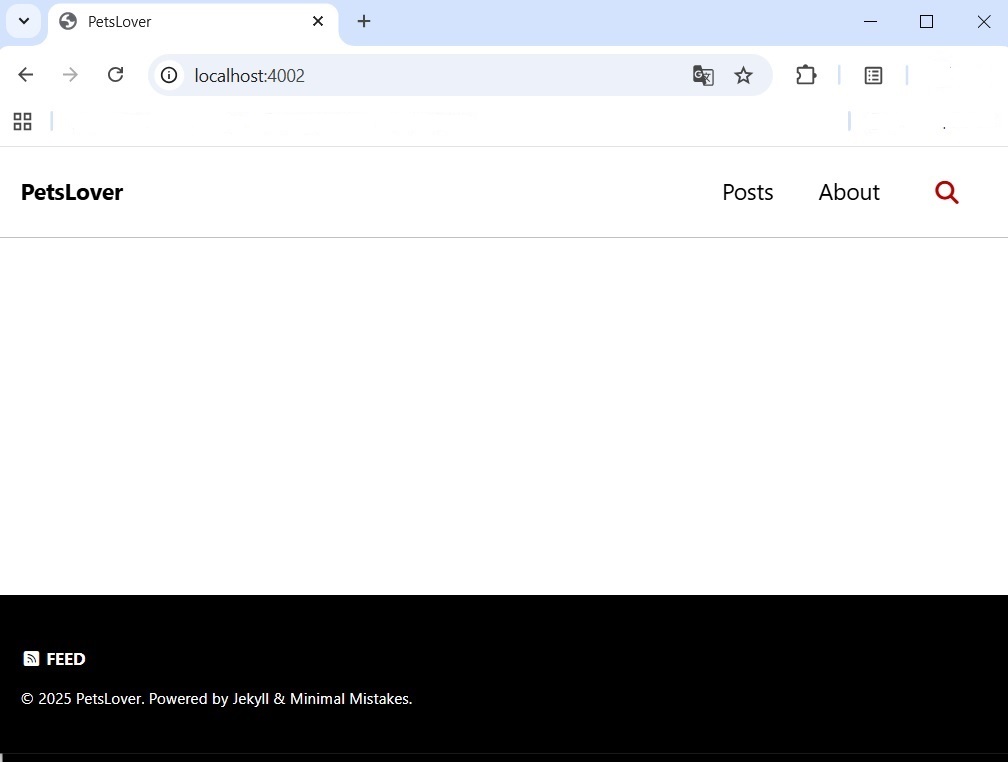
You should be able to see the posts by clicking on Posts, the About page, and also to filter the posts by keywords, even though so far there is only one post.
Layouts
A layout defines look and position of a page elements, such as text and pictures. We use only three layouts available with the theme Minimal Mistakes:
- single
- posts
- splash
Single layout
We use the two columns single layout for posts and pages.
Posts layout
We use the posts layout only for the year-archive.md page that contains the list of posts ordered by year of publication.
Splash layout
We will use the splash layout for index.markdown, the landing page of our website. This layout allows us to split the page in rows and each row in blocks of elements.
Assets
Before updating the landing page we want to use some pictures of cats and dogs that will be shown in it. We create a new folder assets/ where we will copy some pictures. In this folder we can organize the media content that we will add to our future pages and posts. Let’s say we have already copied the pictures we want to show in our landing page index.markdown, two dogs and two cats. We copy also a picture for our logo and an overlay image with hippos. The structure of your repository should look something like this
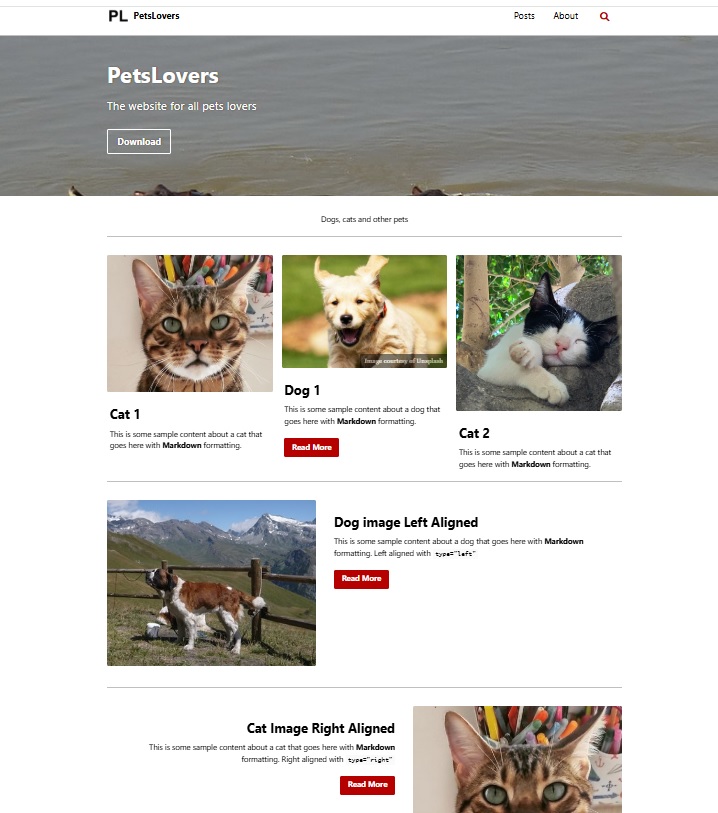
The landing page
So far our landing page is a blank one. We have to change its layout from single to splash with all the elements in the right place. Assuming the assets/ folder has been created and the files copied, we can replace the content of the landing page with the following
---
layout: splash
permalink: /
title: "PetsLovers"
date: 2025-12-16

#-------------------------------- header -------------------------
header:
  overlay_color: "#000"
  overlay_filter: "0.1"
  overlay_image: /assets/images/hippos.jpg
  actions:
    - label: "Download"
      url: "https://github.com/mmistakes/minimal-mistakes/"
  caption: "Photo credit: [**Luigi Selmi**](https://www.luigiselmi.eu)"
excerpt: "The website for all pets lovers"

#-------------------------------- intro -------------------------
intro:
  - excerpt: 'Dogs, cats and other pets'

#-------------------------------- 1st feature row -------------------------
feature_row1:
  - image_path: /assets/images/cat_1.jpg
    alt: "Cat 1"
    title: "Cat 1"
    excerpt: "This is some sample content about a cat that goes here with **Markdown** formatting."

  - image_path: /assets/images/dog_1.jpg
    image_caption: "Image courtesy of [Unsplash](https://unsplash.com/)"
    alt: "Dog 1"
    title: "Dog 1"
    excerpt: "This is some sample content about a dog that goes here with **Markdown** formatting."
    url: "#test-link"
    btn_label: "Read More"
    btn_class: "btn--primary"

  - image_path: /assets/images/cat_2.jpg
    width: 158
    title: "Cat 2"
    excerpt: "This is some sample content about a cat that goes here with **Markdown** formatting."

#-------------------------------- 2nd feature row -------------------------
feature_row2:
  - image_path: /assets/images/dog_2.jpg
    alt: "Dog 2"
    title: "Dog image Left Aligned"
    excerpt: 'This is some sample content about a dog that goes here with **Markdown** formatting. Left aligned with `type="left"`'
    url: "#test-link"
    btn_label: "Read More"
    btn_class: "btn--primary"

#-------------------------------- 3rd feature row -------------------------
feature_row3:
  - image_path: /assets/images/cat_1.jpg
    alt: "Cat 1"
    title: "Cat Image Right Aligned"
    excerpt: 'This is some sample content about a cat that goes here with **Markdown** formatting. Right aligned with `type="right"`'
    url: "#test-link"
    btn_label: "Read More"
    btn_class: "btn--primary"
---
{% include feature_row id="intro" type="center" %}
{% include feature_row id="feature_row1" %}
{% include feature_row id="feature_row2" type="left" %}
{% include feature_row id="feature_row3" type="right" %}
It should be easy to follow the Markdown file. There is an overlay image in the header block with a link for download, an intro block, and three feature rows below. The first feature row contains three elements, each element contains an image, some text, and a link. The elements in the other two feature rows have the same structure. Be sure that the link to the images are correct.
Logo and social networks
We add to the _config.yml configuration file the path to the logo image and the links to our social networks account to be shown on the footer of each page of our website
title: PetsLovers
logo: "/assets/images/petlover_logo.png"
email: your-email@example.com
description: >- # this means to ignore newlines until "baseurl:"
  Write an awesome description for your new site here. You can edit this
  line in _config.yml. It will appear in your document head meta (for
  Google search results) and in your feed.xml site description.
baseurl: "" # the subpath of your site, e.g. /blog
url: "" # the base hostname & protocol for your site, e.g. http://example.com
twitter_username: jekyllrb
github_username:  jekyll

# Build settings
remote_theme: "mmistakes/minimal-mistakes@4.27.3"
minimal_mistakes_skin: contrast # "default" # "air", "aqua", "contrast", "dark", "dirt", "neon", "mint", "plum", "sunrise"
markdown: kramdown

plugins:
  - jekyll-feed
  - jekyll-include-cache

search: true

include:
  - _pages

footer:
  since: "2025"
  links:
    - label: "Twitter"
      icon: "fab fa-fw fa-twitter-square"
      url: "https://x.com/pets-lover"
    - label: "GitHub"
      icon: "fab fa-fw fa-github"
      url: "https://github.com/pets-lover"
    - label: "LinkedIn"
      icon: "fab fa-fw fa-linkedin"
      url: "https://www.linkedin.com/in/pets-lover"
Now we can restart our Jekyll server to use the updated configuration file. If everything is in the right place you should see your landing page similar to this
Pushing your website to GitHub
Once you are done with your local website you need to create a repository in you GitHub account. The name of the repository on GitHub must begin with your user or organization name, in this example pets-lovers.github.io. In your GitHub account you click on the “New” button to open a page to create a new repository. You write petslovers.github.io as the repository name and click on the “Create repository” button. At this point the repository is created and you can push your local website with a few git commands (changing the user name).
echo "# pets-lovers.github.io" >> README.md
git init
git add --all
git commit -m "first commit"
git branch -M main
git remote add origin git@github.com:pets-lover/pets-lovers.github.io.git
git push -u origin main
The website is immediately online at the URL https://pets-lovers.github.io/
Conclusion
We have built a scaffold for our new PetsLovers website based on the Minimal Mistakes theme. We can add more pages, images, posts, and other elements by using more layouts or developing some new ones from scratch as described in the theme website. The markup code and the images used to create the PetsLovers website for this post is available on Pets-Lovers repository. Just clone the repository
$ git clone https://github.com/pets-lovers/pets-lovers.github.io.git
and start your Jekyll server. Have fun!